It is time we talk about what many developers take for granted, the images you use have a big impact on your overall application’s performance and waiting times, especially for applications with a mobile audience.
Image Types
Choosing the right file type will affect your image’s final size. The three most common file types are JPEG, PNG, and GIF. Most of the time using a JPEG file format will result in lighter image size.
For JPEG files when using software like Photoshop or Illustrator you will be prompted to choose the final quality of your image, a high-quality will result of course in larger file sizes, but a medium-quality will be good for most cases as a compromise between the image size and quality.
GIF should be used mostly for animated images, for a non-animated image you should probably use JPEG.
PNG file types are mostly used when you need to use a transparent background, Like when displaying a logo, etc. PNG files will result in larger file sizes because they do not compress the final output as JPEG does, so they should be used less often.
The final file format we should talk about is SVG. SVG’s are highly scaleable and their quality does not change when scaling/resizing them.
SVG file sizes tend to be smaller than PNG and JPEG, but it is not always the case, if you create the images yourself than it might be a good option to check out when exporting the images, if not then you should tell your designers about it.
The reason SVG file sizes can be so small is that they are created inside a text file and are based on XML markup, which means the browser can read the markup and draw the visualization. The size difference comes from the fact that SVG is not created using a bitmap format like JPEG or PNG which generates much more data in order to create the image.
Image Ratio
When working on your personal projects there isn’t a design just waiting for implementation. You probably try to use a different set of colors until you find the right one, or you try different layouts until it feels right. Now when you try to find images that fit your project you will probably google the image you want or use a paid option like Shutterstock.
Let’s say you’ve found an image you like on Shutterstock and you want to use it as a full-width cover image.
You’ve downloaded the image with the highest quality, and its pixel size is 3000 X 2000, an image this large will weigh several megabytes and you don’t want to force your users to download such a large image and increase your application’s loading time.
The first thing you should do is resize the image to a width and height that is acceptable for a full-width cover image. Most screens today support a 1920X1080 screen size, this means you can resize your image to around 1500X1000 and still use the image as full-width with a good quality.
This will reduce the file size to around a few hundred KB, which is still a lot.
We can further improve the image size by compressing our files, compression allows us to drastically reduce our final image’s size.
For example, I’ve got an image that weighs 300KB, I’ve used google to search for “compressing PNG”, and the first result was an online tool to compress PNG files.
I’ve uploaded my file and after compression there was a 54% decrease in the file size which is pretty significant. The quality does not seem to have changed too much which is what we are going for.
Compression will always yield big wins for your images size, don’t forget to use it.
Many online tools can help you compress your files, just search for “image compression” / “image optimization tool”, and you will find plenty of free online tools available.
Image Quality
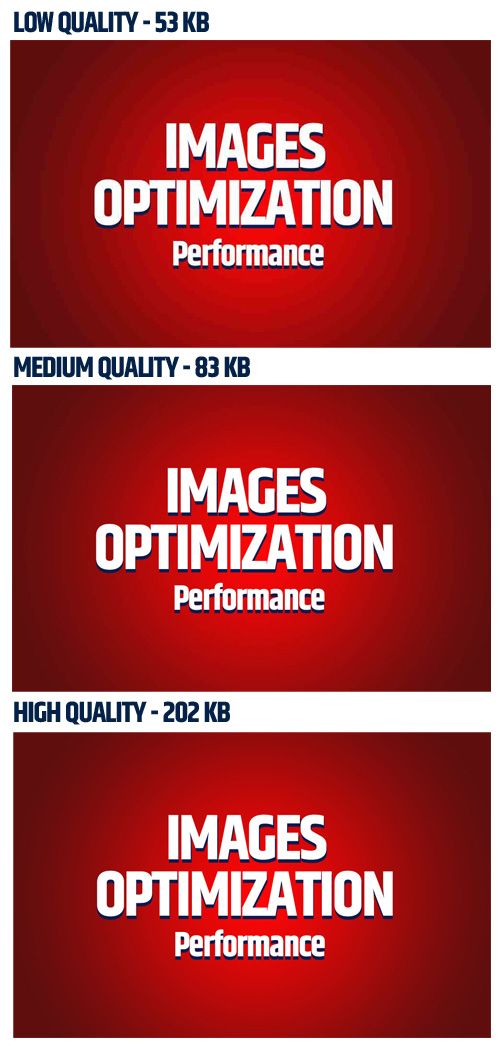
When you save a JPEG file you can choose the quality level of the image. The quality will impact the image’s size accordingly. I’ve used this article feature image as an example and saved it at three different quality levels.
As you saw in the image above, the low-quality image is much less desirable to show to your users, the medium-quality and the high-quality are quite similar if not the same, that’s why we will prefer using the medium-quality image because of its file size.
Many Front-end developers do not know how to use an application like Photoshop, while it is definitely not a requirement to be an amazing developer, knowing your way around an imaging software might save you some headaches waiting for the designer to crop the image or change it’s color the way you need it.
Lazy Loading Images
Lazy loading means that any work we don’t have to do right now we should do later. When it comes to images it means we only load them when an image scrolls into the user’s viewport.
Let’s say you have an e-commerce web application, when a user enters your site you will download all of the images for the page the user has entered, by loading all of them at once and not only the images that the user should see at his current viewport, you will cause a larger waiting time until they all finished downloading.
Many users today browse websites through their mobile phones instead of using a desktop computer, while a desktop user might enjoy a performant experience because of a better internet connection, your mobile users use a much less performant internet connection. They will probably be staring at a blank image until all the other images finish downloading.
When you use a lazy loading method you will instantly enhance the overall experience and speed of your application, and directly affect your mobile users.
There are many different lazy loading implementations around, this implementation looks simple enough and is taken from imagekit.io:
By using all of the previously mentioned optimizations at my prior workplace I was able to reduce the total weight of images the user had to download from 7.8MB to 2.4MB which is almost a 70% difference. The following section suggests a way to further improve file sizes and overall performance.
Using Thumbnails For High Performance
Let’s return to the e-commerce example from the previous section, after we’ve made all the mentioned optimizations ( Lazy loading, correct images types, correct images quality, compression), each product’s image displayed at the application should weigh less than 100KB.
To decrease the products image sizes even further we can separate our product images to two different sets, a set of regular-sized images that should be used inside the product page, and a set of thumbnail images for the home/category pages where we don’t display the image at full size.
By creating another set of images we can decrease the size of the images to a maximum size of around 30KB per image ( don’t forget to compress the thumbnail images as well ). By doing so we’ve gained another huge performance boost and increased the performance DRASTICALLY for mobile users.
For some readers, this article might be pretty obvious, yet it seems that optimizing images is missed by many developers.
I believe you are now more than capable of tackling performance issues when it comes to image optimization, and this will be another skill in your skillset.


